In kayaking and other water sports, where the rush of rapids and the serenity of still waters coexist, safety remains the cornerstone of every adventure.
Among the myriad of safety techniques and equipment available to paddlers, the throw rope stands out as a versatile and indispensable tool.
Mastering the use of a throw rope is not just a skill—it’s a responsibility that every kayaker should embrace.
This simple yet ingenious device has the potential to transform a perilous situation into a successful rescue, making it an essential component of any kayaker’s safety arsenal.
In this blog post, I’ll talk about throw ropes, exploring their design, uses, techniques, and the critical role they play in kayaking safety.
Stay tuned.
What is a Throw Rope?
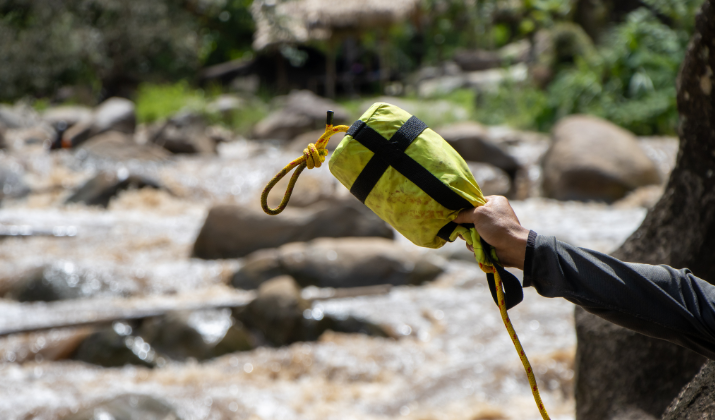
A throw rope, often referred to as a throw bag or rescue line, is a specialized piece of safety equipment designed for quick deployment in water rescue situations.
At its core, it consists of a length of floating rope (typically ranging from 50 to 75 feet) neatly packed into a compact, buoyant bag.
The rope is usually made from polypropylene or polyethylene, materials chosen for their ability to float and resist water absorption.
The key features of a throw rope include:
- Quick-release design: The rope can be deployed rapidly from the bag with a single throw.
- Floating capability: Both the rope and bag float, ensuring visibility and accessibility in water.
- High visibility: Many throw ropes come in bright colors like yellow or orange for easy spotting in turbulent waters.
- Durability: Constructed to withstand the rigors of whitewater and frequent use.
- Compact size: Easy to store in a kayak or wear on a rescue PFD (Personal Flotation Device).
When to Use a Throw Rope
The versatility of a throw rope makes it an invaluable tool in various rescue scenarios:
- Rescuing a swimmer in moving water:
- When a paddler has been separated from their kayak and is struggling in current.
- In situations where swimming to the shore is challenging or dangerous.
- Providing assistance to a stranded kayaker:
- When a kayaker is pinned against a rock or other obstacle.
- To help a kayaker ferry across a strong current to reach an eddy or the shore.
- Setting up mechanical advantage systems:
- For complex boat recovery operations where additional leverage is needed.
- To create a highline for crossing dangerous sections of a river.
- Establishing safety lines:
- To set up a temporary handline across a creek or narrow river.
- As part of a larger rescue system in swift water rescue scenarios.
- Emergency moorings:
- To secure a kayak in unexpected conditions or during rescue operations.
Understanding when to deploy a throw rope is as crucial as knowing how to use it.
It requires quick assessment of the situation, consideration of potential risks, and confident decision-making.
Proper Throw Rope Technique
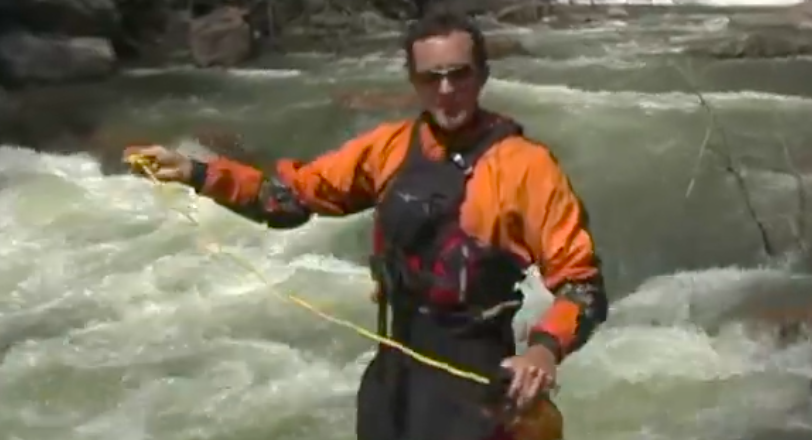
Mastering the throw rope technique is essential for effective rescues. Here’s a detailed breakdown of the proper technique:
- Preparation:
- Hold the bag in your dominant hand (throwing hand).
- Grasp a small section of the rope inside the bag with your non-throwing hand.
- Ensure your footing is stable and you have a clear throwing path.
- Aim:
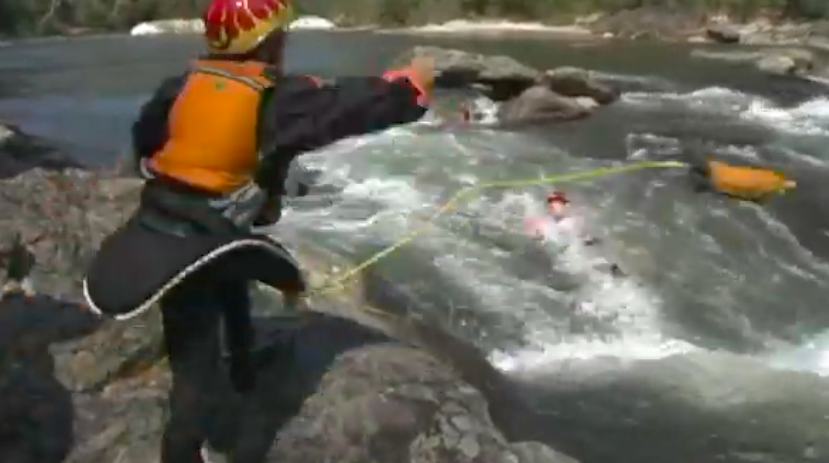
- Identify your target—aim for a spot slightly upstream of the person in need.
- Consider the current’s speed and direction to anticipate where the rope will land.
- Make eye contact with the person you’re rescuing and clearly communicate your intentions.
- Throw:
- Use a smooth, underhand throwing motion.
- Release the rope at the apex of your throw for maximum distance.
- Put power into the throw, but maintain control for accuracy.
- Follow-through:
- Continue the throwing motion after releasing the rope.
- This follow-through helps ensure maximum distance and accuracy.
- Be prepared to quickly adjust your position or make a second throw if necessary.
- Communication:
- Clearly and loudly instruct the person to grab the rope, not the bag.
- Use simple, direct commands like “Grab the rope!” or “Rope coming!”
- Continue providing instructions, such as “Kick to shore!” or “Hold on!”
- Belay and Retrieval:
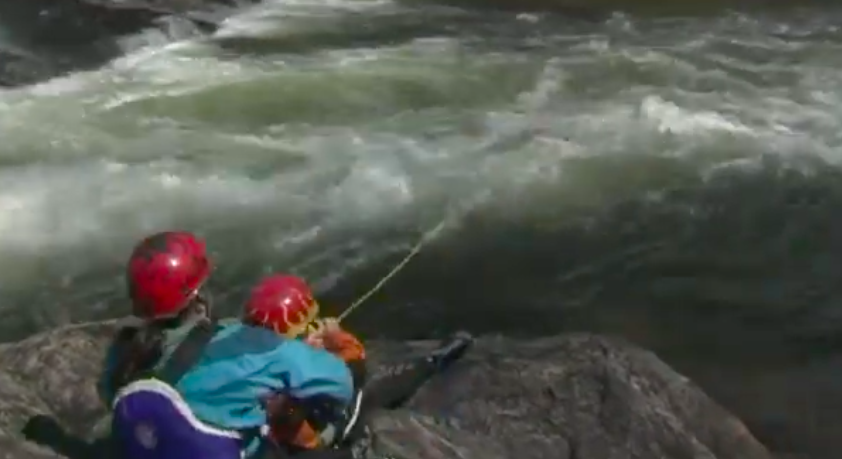
- Once the person has grabbed the rope, adopt a stable stance to belay them.
- Use your body weight and leg strength, not just your arms, to control the rope.
- Guide the person to a safe exit point, working with the current when possible.
- Coiling and Repacking:
- After use, properly coil the rope to prevent tangles.
- Repack the rope into the bag methodically to ensure smooth deployment in future uses.
Practice Makes Perfect
Developing proficiency with a throw rope requires consistent practice. Here are expanded practice methods and exercises:
- Target practice on land:
- Set up targets at various distances (10, 15, 20 meters).
- Practice throwing from different angles and positions.
- Use hula hoops or marked areas as targets to improve accuracy.
- Throwing from different positions:
- Practice throws while standing, kneeling, and sitting.
- Simulate throwing from a kayak by sitting on a chair or kayak on dry land.
- Try throws with your non-dominant hand to increase versatility.
- Practicing in moving water (safely):
- Start in slow-moving water and progress to faster currents as skills improve.
- Practice with a partner, taking turns being the rescuer and the “victim.”
- Simulate real rescue scenarios, including communication and belay techniques.
- Rapid deployment drills:
- Practice quickly accessing and deploying your throw rope from its storage position.
- Time yourself to encourage faster response in emergency situations.
- Distance and accuracy challenges:
- Set personal records for throwing distance and accuracy.
- Create friendly competitions with fellow paddlers to make practice enjoyable.
- Low-light condition practice:
- Practice throws in dim light to simulate dawn, dusk, or overcast conditions.
- Use glow sticks or reflective markers to make targets visible.
- Multiple-throw scenarios:
- Practice making quick second or third throws if the first attempt misses.
- Work on rapidly coiling and redeploying the rope between throws.
- Integration with other rescue techniques:
- Combine throw rope practice with other skills like hand signals and whistle commands.
- Practice using the throw rope as part of larger rescue systems or scenarios.
Remember, the goal is to make the throw rope technique second nature, allowing for quick and effective deployment in high-stress situations.
Maintenance and Care
Proper maintenance of your throw rope is crucial for ensuring its reliability when you need it most:
- Regular inspection:
- Check the entire length of the rope for signs of wear, fraying, or damage.
- Inspect the bag for tears, worn seams, or failing closure systems.
- Examine any hardware (like carabiners) for corrosion or damage.
- Cleaning:
- Rinse the rope and bag with fresh water after each use, especially after exposure to salt water or muddy conditions.
- Use mild soap if necessary, but avoid harsh detergents that could damage the rope fibers.
- Allow the rope and bag to air dry completely before repacking.
- Storage:
- Store your throw rope in a cool, dry place when not in use.
- Avoid prolonged exposure to direct sunlight, which can degrade the rope over time.
- Keep the rope loosely coiled or lightly packed to prevent permanent kinks.
- Repacking:
- Regularly unpack and repack your throw rope to prevent settling and ensure smooth deployment.
- Use proper technique when repacking to avoid tangles or knots.
- Replacement:
- Replace your throw rope if it shows significant signs of wear, has been subjected to high loads, or is more than 5 years old.
- Keep a log of your rope’s usage and age to track when replacement might be necessary.
- Testing:
- Periodically test your throw rope’s strength and floatation in a controlled environment.
- Practice throws with your rope regularly to ensure it’s functioning correctly.
- Protection:
- Use a protective cover or case for your throw bag when transporting it to prevent damage from abrasion or sharp objects.
- Documentation:
- Keep any manufacturer’s instructions or guidelines for reference.
- Consider marking your rope with the date of purchase and any significant uses or inspections.
By maintaining your throw rope diligently, you ensure that this critical piece of safety equipment will perform reliably when lives are on the line.
Conclusion
The throw rope, in its simplicity and effectiveness, embodies the spirit of kayaking safety.
It represents not just a tool, but a kayaker’s commitment to the well-being of themselves and their fellow paddlers.
Mastering the throw rope is a journey that extends beyond mere technique—it’s about developing judgment, fostering a safety-first mindset, and being prepared for the unexpected.
As you continue your kayaking adventures, let the throw rope serve as a constant reminder of the responsibility we all share on the water.
Its presence in your kit is a testament to your preparedness, and your proficiency with it is a valuable contribution to the kayaking community.
Enjoyed Top Throw Rope Tips & Techniques Every Kayaker Should Know? Share it with your friends so they too can follow the KayakHelp journey.
Share on Pinterest

