Unfortunately, not all of the best fishing kayaks are compatible with a pre-built trolling motor mount.
And even if they are, those mounts can add to the already-expensive start-up costs that go into completing your setup for kayak fishing.
While there are other reasons why you might install a trolling motor mount on the back of your kayak, fishing is the most common. Anglers need to have their hands free to handle their fishing rods and often like to move quickly from spot-to-spot without having to paddle.
That makes one of the best kayak trolling motors an essential purchase for kayak anglers. But it also means that you’ll have to do some research into how to make a trolling motor mount for a kayak if you don’t want to buy one.
Luckily, many enthusiastic DIYers have come before you and experimented with multiple methods for making a trolling motor mount for a kayak.
And we’ve compiled tons of research from across the Internet into this one article to serve as a guide if you’re interested in learning how to make a trolling motor mount for a kayak!
How To Make A Trolling Motor Mount For A Kayak?
Your imagination and creativity are really the only things that are going to limit you when it comes to designing and building a trolling motor mount for a kayak.
But here are several easy-to-follow templates that will help to clarify the process and provide you with a directional heading (kayak navigation pun!).
Choose The Location For Your Mount
Before you get started, you’ll need to decide where you want to mount a trolling motor on your kayak.
Certain motors are designed to be mounted off the side of your kayak’s gunwales, some mount directly off the stern of the kayak, and others are designed to be mounted at the bow.
There are certain advantages and disadvantages to all of these mounting areas. For starters, mounting a motor off the side of your kayak usually makes the handle more accessible to you when you’re seated in the cockpit of your kayak.
This position is advantageous for the type of trolling motor that you’ll need to control by hand while seated. But if you don’t go with that type of trolling motor, you’ll have a little more freedom to mount at the bow or stern of your kayak.
Motors that you mount either at the bow or stern of your kayak will either need to be controlled remotely or link to the foot pedals inside your kayak.
Because only the best river fishing kayaks will usually be outfitted with a skeg and foot pedals, you might consider the benefits of a remote-controlled motor if you desire a bow or stern mounting position.
If you do go with a stern position, however, you’ll have the freedom to choose a remotely operated motor or one that simply replaces the skeg at the back of your kayak.
For those of you that prefer a bow mounting position, a remotely controlled motor is going to be the best option for you.
These remote-controlled motors can be a little more expensive, but there is one important advantage of mounting your trolling motor at the bow of your kayak.
This allows you to more safely keep a line in the water behind your kayak without worrying about it getting caught in the propeller as you’re reeling the line in.
Select Your Materials
Once you’ve decided on the location on your kayak where you want your trolling motor mounted, it’s time to select the right materials for the job.
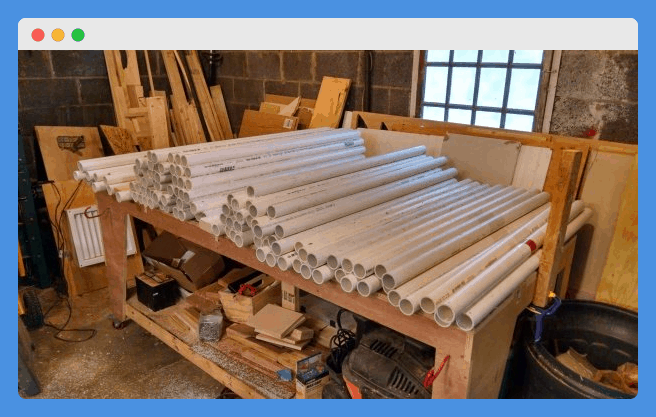
Two of the most common materials used for DIY trolling motor mounts are wood (two-by-fours and/or one-by-twos) and PVC piping.
PVC piping gets our nod over wood because of its waterproof properties. You won’t have to worry about your PVC piping getting wet and sagging or bowing like you might with untreated or unprotected wood.
That being said, most PVC piping doesn’t offer as much sheer strength as wood. So if you select a heavier trolling motor or one with a lot of thrust, you might want to go with wood over PVC.
If you do choose wood for your trolling motor mount, you’ll need to choose treated wood if you don’t want it to suffer the effects of being exposed to water every time you go out.
Otherwise, you’ll need to choose a waterproof stain and add at least two even coats before you install the wood onto your kayak. If you do go with PVC piping, the one way that you can add extra strength is to slide a piece of rebar inside of each straight section of the pipe.
That will, however, add more weight to your overall motor mount. And speaking of weight, it’s always important to consider how much weight your motor mount will add to your kayak’s weight.
This is because the motor you’ve chosen is rated to provide only a certain amount of thrust. So you need to make sure that the trolling motor mount you build doesn’t add too much weight to your kayak.
Otherwise, you’ll eventually find out that your trolling motor itself is much less effective than it should be once you’re out on the water.
Drill Mounting Holes
This step may not always be necessary depending on the design of your kayak. Certain fishing kayaks (especially the best inflatable fishing kayaks) come with mounting locations already behind the seat or at the bow or stern of the kayak.
If you have a kayak that is already built for a trolling motor mount to be secured directly to the exterior of the deck, you can scroll down to the next step.
But if you don’t, you’ll need to know how to drill holes in your kayak. Before you pick up your drill, find a pencil or Sharpie that’s close at hand.
You’ll want to carefully mark the locations for your drill holes before you go drilling away at random, and you should be sure to measure so that the holes are the appropriate distance apart and away from the sides of your kayak.
Next, make sure you choose the right size bit for drilling the holes in your kayak. You want the holes you drill to be slightly smaller than the bolts or screws you’re going to use to attach your motor mount to your kayak so that you can better guarantee a watertight seal.
From there, you can start to drill the holes that you’ll eventually use to attach your trolling motor mount to your kayak.
Just make sure you drill gently and reverse the drill when you’re removing it from the hole so that you don’t make your holes too wide or damage your kayak during this process.
Construct Your Motor Mount
The exact process you use to construct your motor mount will depend on whether you’re aiming to mount your motor on the side, bow, or stern of your kayak.
But there are still several things you should consider during this construction process.
The first important consideration is that your trolling motor will need to extend underneath and far enough away from your kayak so that the propeller doesn’t hit the hull of the kayak as you’re turning it in either direction.
Consider the shaft length of your trolling motor and the hull depth of your kayak in order to make sure the propeller won’t hit the hull when it’s turning.
From there, you’ll need to measure how far away from the kayak the mount will need to extend before you’re able to secure the motor to it.
For this reason, it can be easier to already have your trolling motor before you set out to construct your own motor mount.
That allows you to visually check your measurements rather than going off the stock dimensions and specifications for a certain trolling motor you’re hoping to buy later.
Attach Your Motor Mount To Your Kayak
Once you have the basic structure of your motor mount constructed, it’s time to attach it to your kayak using the appropriate hardware.
And choosing the appropriate hardware can depend on the design of your fishing kayak.
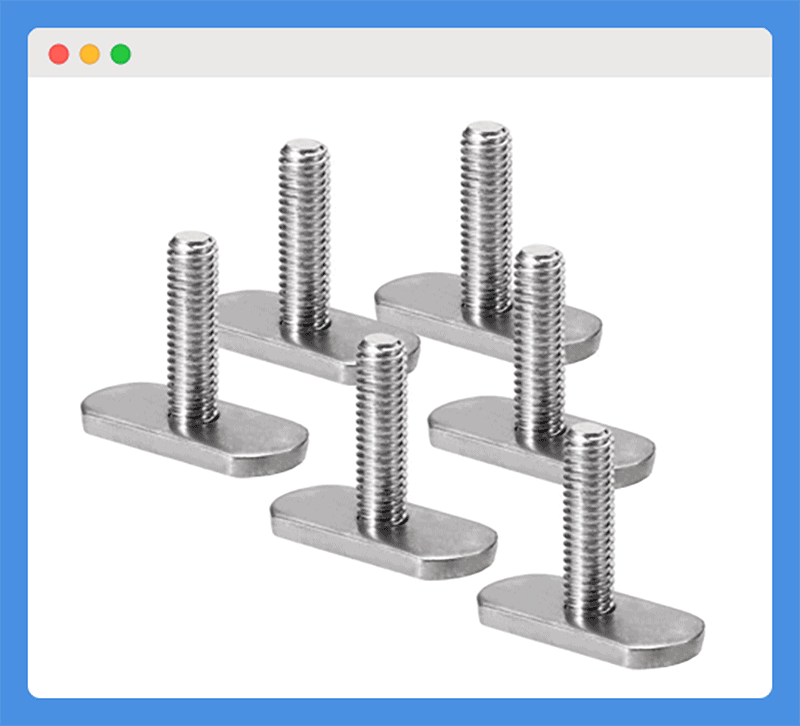
If your fishing kayak has previously mounted locations that are designed for a motor mount, you’ll probably use something like the kayak rail bolts that I’ve included a picture of below.
These bolts are designed to go inside a pre-existing rail on your kayak and then they secure with a nut or washer.
If you use this solution, just make sure the bolts you buy are long enough to extend through the holes on your newly constructed motor mount.
If you don’t have rails on your kayak, you’ve probably gone with the method of drilling holes through the kayak so that you can then attach your motor mount using them.
If you choose this solution, you’ll need a few additional pieces of hardware to attach your mount. Please keep in mind that this solution is only recommended if you have easy access to the inside of your kayak via a storage compartment or bulkhead opening.
This is because you’ll need to thread your bolts from the inside of your kayak up and through the holes before securing them in place.
As you might imagine, this means that you’ll need longer bolts if you choose this method, but you’ll also need a few additional pieces of hardware.
While you can use something like the kayak rail bolts pictured above, we don’t recommend it because of the stress the flat base will place directly on the plastic of your kayak.
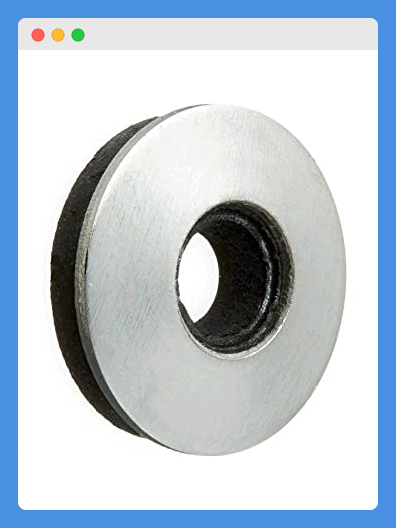
That’s why we recommend using longer bolts with a sealing washer secured around the head of the bolt. Some folks even utilize a second sealing washer when they secure the other end of their bolts to the top of their kayak motor mount.
These sealing washers are what will ensure that you replace the kayak’s original watertight seal once your motor mount is installed.
Here’s a photo of one type of sealing washer you might consider for the job:
From there, you’ll simply need to secure your bolts in place with a nut and tighten them down snugly, but not too tightly.
Overtightening your bolts can place extra stress on the plastic of your kayak and the wood or PVC material used for your trolling motor mount.
Trolling Motor Mount Image Ideas
In this section, we’ll simply provide a number of images of trolling motor mount designs to help you dream up the best design that works for you.
We’ve also added a short caption to each image to help you understand what the building was going for.
Wooden Side-Mount Design
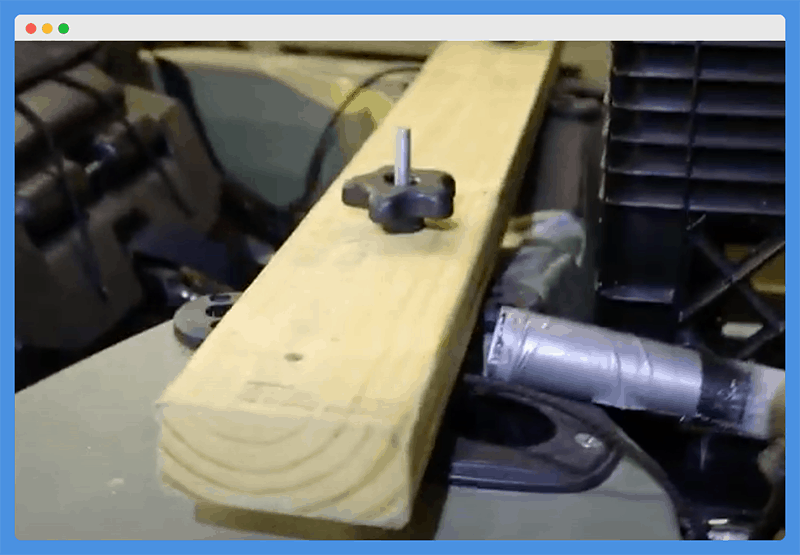
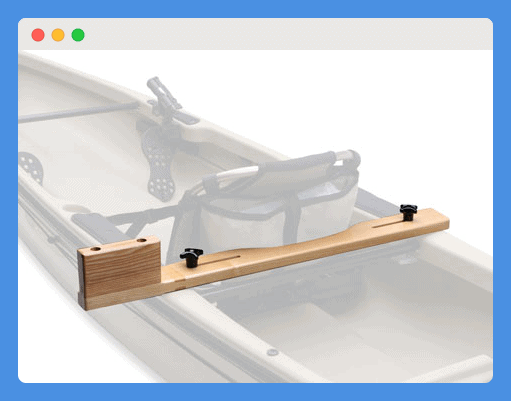
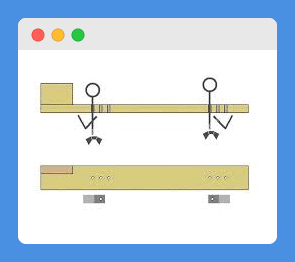
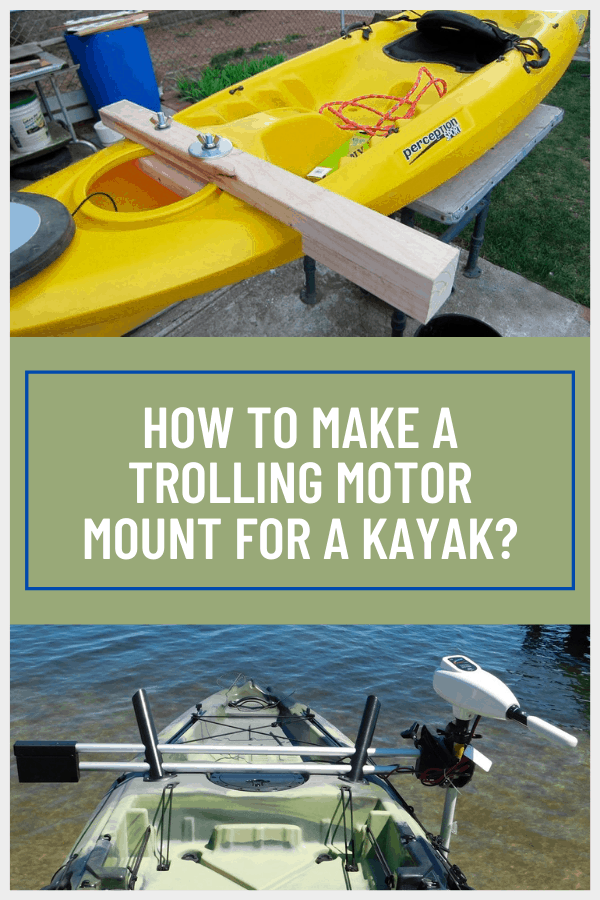
This design goes across your kayak just behind the captain’s chair. It usually one piece of wood, washers, thumbscrews to secure in place.
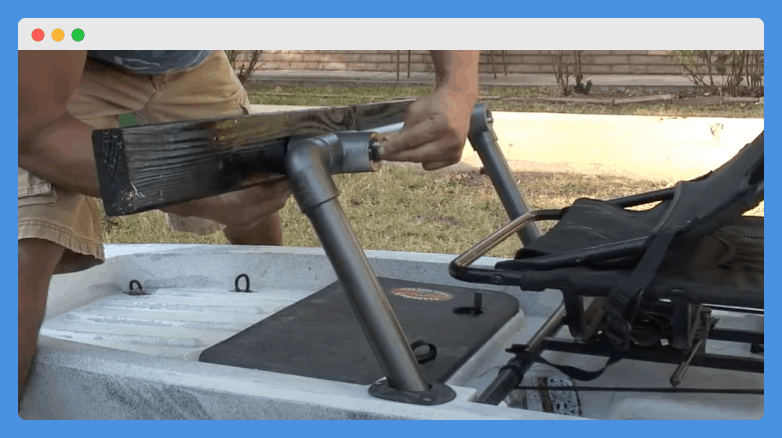
PVC + Wooden Mount Design
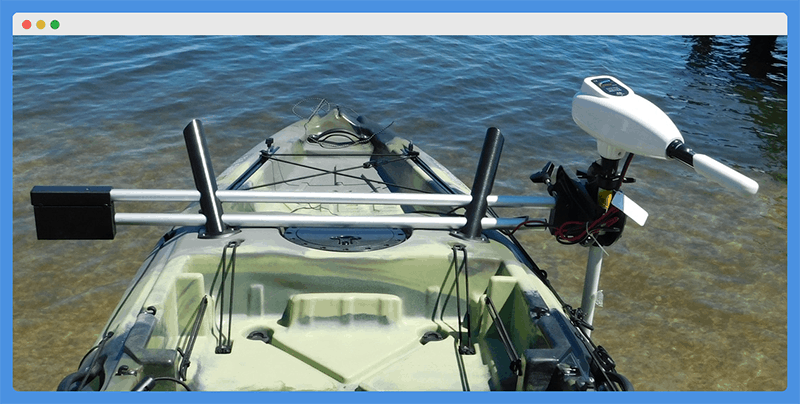
This gentleman used the fishing rod holders mounted into his kayak for his design.
He inserted vertical PVC pipes into each holder and then secured a horizontal two-by-four to the PVC that extends off the side of his kayak and holds his trolling motor.
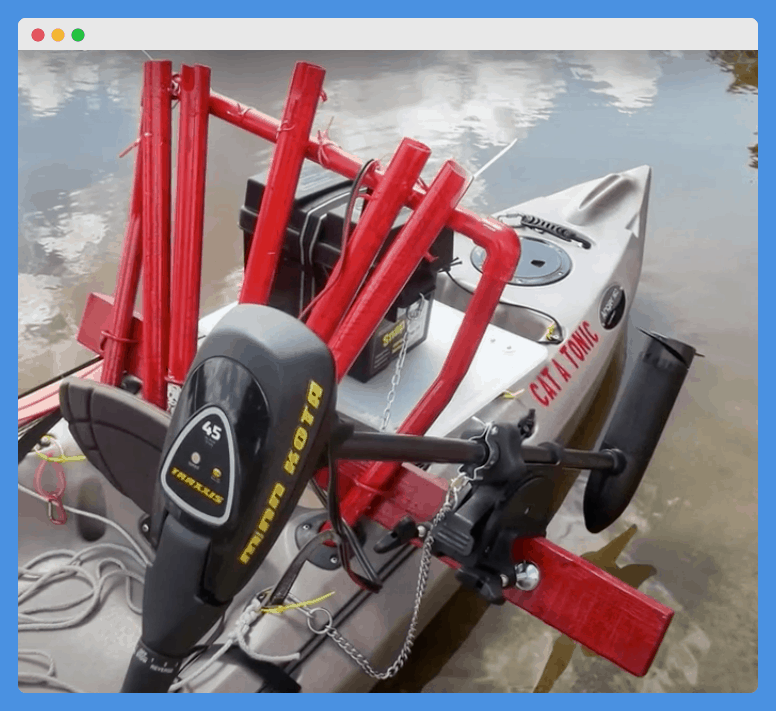
The “Added Rod Holders” Design
This gentleman also used the mounted rod holders in his kayak to provide the base for his design.
But he also added U-shaped bolts and PVC pipes to not only replace the two rod holders he had lost, but then he even added three more!
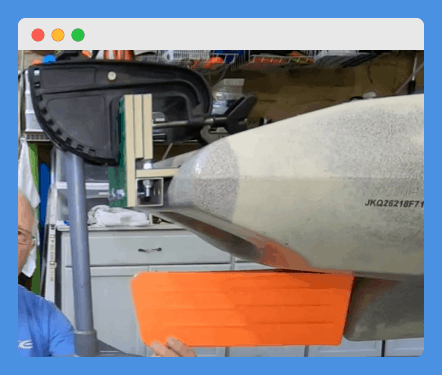
Rear-Mounted Design
This gentleman used the handle at the stern of his fishing kayak to create a motor mount.
He used HDPE sheeting to create a platform and then bolted that secured into the handle area to create a stable platform for his trolling motor to attach to.
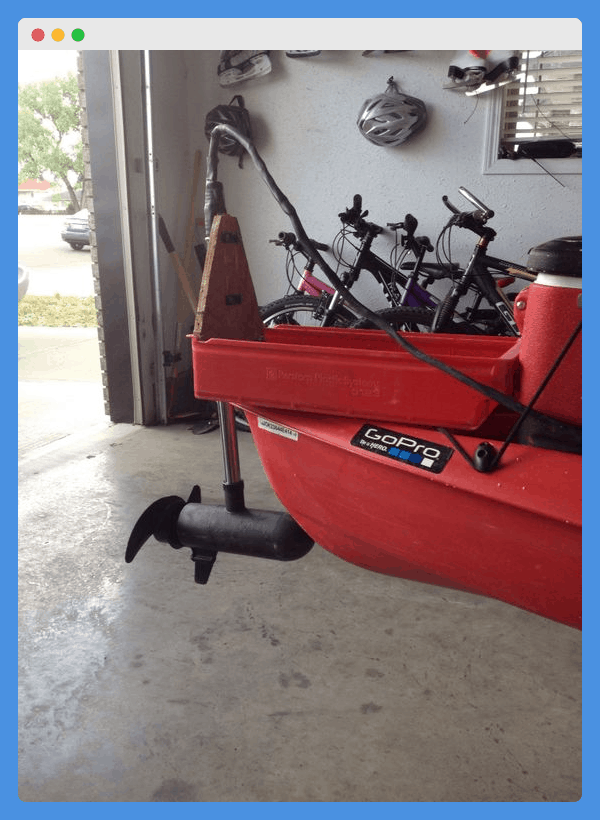
The “Old Toolbox” Design
This creative individual used what appears to be the bottom of an old toolbox and secured that to the stern of their kayak to create a transom mount.
This idea then also gave them the perfect container for their trolling motor battery.
Best Trolling Motor Mounts For A Kayak
If you decide that this DIY project is going to be a little too much for you to handle, you might just consider purchasing a prefabricated motor mount. So we thought we’d provide you with a few of our favorite motor mount models from top brands!
1. RAILBLAZA Kayak Trolling Motor Mount
The RAILBLAZA Kayak Trolling Motor Mount is another great solution for side-mounted applications.
It can handle trolling motors with thrusts up to 36 pounds and it comes with all the necessary hardware for a complete installation.
You’ll be able to set it up to place your motor on the right or left side of your kayak and it actually clips on for added convenience.
This means that it’s easily removable if you ever want to use your kayak without your trolling motor attached. This motor mount is also compatible with RAILBLAZA’s RailMount 32-41 accessories.
These accessories give you the ability to add rod holders, lights, or even camera mounts right behind your kayak seat. The brackets fit almost all kayaks, but the horizontal bar is designed for kayaks with a maximum width of 32 inches.
It’s also compatible with most popular trolling motors, so long as their thrust capacity is below the mount’s limitations.
2. ProControll EZ Mount Trolling Motor Mount
The ProControll EZ Mount Trolling Motor Mount is ideally suited for attaching a trolling motor to the bow of your kayak.
But it can also work for a stern-mounted application if you have a kayak with a thin, molded-in handle at the stern. This motor mount secures onto kayak rails or handles from one to three inches thick.
And the bolts secure down in place with the twisting knobs you can see at the front of the mount (much like the knobs at the base of most Christmas tree stands!).
It can accept any transom-mount trolling motor and it has a total weight of just six pounds, which means you don’t have to worry about it adding too much weight to your set up.
And it doesn’t require any tools for a complete installation. This motor mount is also designed with virtually indestructible fiberglass-reinforced nylon external parts that are resistant to corrosion.
The internal parts are manufactured with zinc-plated stainless steel for added strength and durability.
3. Crack of Dawn Paddle Sports Malibu Kayaks Trolling Motor Mount
The Crack of Dawn Paddle Sports Malibu Kayaks Trolling Motor Mount is a great solution for turning a standard recreational kayak into an electric-powered fishing kayak.
Even the best recreational kayaks don’t come with places to mount a trolling motor, so this has to be the complete package. It’s designed to help you install a trolling motor just in front or just behind the seat in your kayak.
And it includes all of the bolts, nuts, mounting brackets, washers, and horizontal bars you need for a complete installation.
This motor mount will work with most standard trolling motors and all of its components are made from steel that has been powder coated for added durability and resistance to the elements.
4. Brocraft Inflatable Kayak Trolling Motor Mount
The Brocraft Inflatable Kayak Trolling Motor Mount is the perfect solution if you have an inflatable fishing kayak that you can’t drill holes into.
It’s adjustable for different hull widths and it can be installed on almost any inflatable kayak, whether it already has mounting rails or not.
That’s because this motor mount comes with glue-on pads that attach directly to the gunwales of your inflatable kayak. Although this mount doesn’t come with the appropriate marine-grade glue for those pads, it is compatible with PVC inflatable SUPs as well as kayaks.
The entire package also includes a marine-grade aluminum track bar, a SuperStrong aluminum motor mount, and a double-sided, nylon-protected motor clamp. The bar can also be adjusted to accommodate trolling motors with shorter shafts.
5. Brocraft Universal Kayak Trolling Motor Mount
The Brocraft Universal Kayak Trolling Motor Mount is designed for side-mounted applications. And, as you can see, it comes with an additional two rod holders that mount right to the horizontal mounting bar.
The great benefit of this motor mount is that it’s adjustable to different widths, which is why they can label it as a universal mounting solution.
That being said, it’s not sufficient for those that want to attach their motor to the bow or stern of their kayak. It is, however, capable of supporting trolling motors with thrusts up to 35 pounds and it’s designed for easy installation to the gunwales of your kayak.
In fact, the aluminum bases clamp securely to kayaks with different angled gunwales. This mount can also be adapted to secure your trolling motor to either side of your kayak.
And the motor clamp is double-sided with nylon to make attaching your motor easy and reduce vibrations.
Final Thoughts
As you’re planning how to make a trolling motor mount for your kayak, it’s really important to think about protecting the integrity of your kayak as much as possible.
While you’ll probably need to drill several holes into your kayak to make your mount hold, more holes equal great potential for leaks.
If you can minimize the number of holes you need to drill when making a trolling motor mount, you’ll maintain the waterproof design of your kayak.
That means it’ll float and perform better, and it will also retain its value better if you do decide to sell it an upgrade to a different model in the future.
As you can tell, there are a lot of different ways to go about making a trolling motor for a kayak because there are so many different kayak designs out there.
But this video and this video offer excellent visual examples for how to construct two very different trolling motor mounts for a kayak.
We hope the insights and advice we’ve provided in this article are useful to you as your embark on your own DIY kayak trolling motor mount project.
And we wish you the best of luck making a solid and functional trolling motor mount for a kayak!

