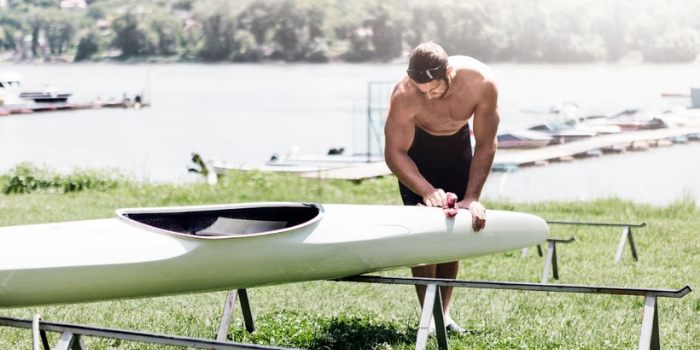
Cleaning your kayak is a simple but necessary part of owning a kayak. If you are new to kayak ownership, you need to know the basics of how to clean a kayak properly and completely.
The need to clean your kayak goes beyond just not wanting to find eight-legged inhabitants riding along every time you take your sit-in kayak out on the water. It is also important for your kayak’s long-term health and also the health of our world’s waterways.
Transporting aquatic invasive species is something that most boaters should be very aware of these days. Kayakers and paddleboard owners also need to adequately clean their vessels in order to prevent transferring invasive species to new and sensitive environments.
In this guide, we are going to highlight how to clean your kayak thoroughly, what kinds of products you will need to clean a kayak, and how frequently you should be cleaning your kayak.
Let’s get to it!
Photo by Nature’s Charm via Shutterstock
Why Clean a Kayak?
Photo by Grand Teton via Flickr
There are many important reasons to clean your kayak regularly and effectively. Here are the most compelling benefits of cleaning your kayak:
- Remove saltwater that could cause rust or corrosion to certain components
- Remove other chemicals or substances that can degrade your kayak
- Prevent the spread of aquatic invasive species
- Maximize the life of your kayak by caring for it properly
- Prevent the accumulation of mold or mildew
- Avoid insects and small critters making second homes inside your kayak
- Be excited to get into a clean kayak every time you want to paddle!
This may not be a complete list of the benefits of cleaning a kayak, but they should provide enough motivation for you to spend a little extra time caring for the investment you have made into one of the best recreational kayaks!
How Often Should You Clean Your Kayak?
Photo by GlacierNPS via Flickr
The simple answer to this question is that you should clean your kayak after each use. Being realistic, however, there are certain small cleaning tasks you can do each time and others that can be done less frequently.
That said, you should thoroughly clean your kayak before bringing it to a new lake, river, or any other aquatic environment. This step is the most important thing you can do to prevent the possibility of introducing a dangerous aquatic invasive species to that environment.
More realistically, here are a few cleaning tasks you can do every time you finish a paddle trip:
- Drain your kayak completely
- Give it a quick wipe down
- Remove all kayaking accessories and allow them to dry completely
- Open storage hatches to allow them to dry completely
- Store your kayak in a garage or covered shed to prevent moisture from accumulating inside
When you are ready to perform a more thorough cleaning process, here are some of the kayak cleaning tasks that you can get away with doing a little less frequently:
- Fully rinsing the hull and using a sponge to remove accumulations of scum or debris
- Vacuuming any sand, dirt, or debris out of the cockpit and storage compartments
- Hosing off the kayak seat to remove any embedded sand or debris
- Applying a kayak wax to provide an additional layer of weather protection
- This is only applicable for fiberglass, carbon fiber, and wooden kayaks
- Repairing or replacing any bungees that are stretched out
- Repairing or replacing broken toggle-style kayak handles
Later on, we will provide a step-by-step process for how to clean a kayak, but this hopefully gives you an idea of the regular and less frequent tasks you can do to keep your kayak looking clean and shiny.
What Do You Need to Clean Your Kayak?
Photo by Alexander Raths via Shutterstock
Before you can clean your kayak, you will need to compile the right supplies for kayak cleaning. Here is a quick list of what you will need for a proper kayak cleaning process:
- A thick sponge (the kind that you would also use to bail water out of a sit-inside kayak)
- One of the best kayak cleaning solutions
- Multiple small towels or microfiber cloths
- A bucket of fresh water (or a hose hooked up to a freshwater source)
- Portable folding kayak stands (or something to set your kayak on to keep it off the ground)
- A portable shop vacuum (or close proximity to your home’s central vacuum)
- A large cotton or microfiber towel (for drying)
In addition to these cleaning supplies, you might also consider assembling the supplies you need to perform minor repairs to screws, bungee rigging, or other components of your kayak.
Once you have your kayak set up for the cleaning process, this is also a great time to make a few minor cosmetic upgrades or repairs as needed.
How to Clean a Kayak?
Now that you have all of your kayak cleaning supplies gathered, it is time to get started. Let’s begin with talking about choosing the right time of day to clean your kayak and then move through an easy-to-follow kayak cleaning procedure!
Choosing the Right Time to Clean A Kayak
Photo by Magdalena Luchter via Shutterstock
Obviously, most of you probably aren’t going to start cleaning your kayak in the dead of night. That being said, there are a few small considerations you should be aware of that will help you maximize your efforts.
When you clean a kayak, it is really important that you allow enough time after cleaning for everything to dry completely. If you plan to move your kayak into a climate-controlled garage or storage shed after cleaning, this is less of an issue.
If your kayak is stored outside, however, it is best to start your cleaning procedure in the mid-morning. This will maximize your efforts by allowing your kayak plenty of time to dry during the hottest hours of the day.
If the day you intend on cleaning your kayak winds up being overcast and rainy, you are better off waiting for clear weather to perform this essential kayak maintenance task.
Set Up Your Kayak For Success
Photo by Kristin Greenwood via Shutterstock
Once you are sure you have a clear and warm day to clean your kayak, it is time to set yourself up for success. Get your kayak stands out and set them up somewhere that is going to receive a good amount of direct sunlight for the remainder of the day.
The reason we recommend using kayak stands to clean your kayak is that getting it up and off the ground will prevent grass and other debris from getting stuck to the kayak once it gets wet.
It will also make it easier to turn the kayak over after you have finished cleaning the deck and cockpit and it is time to clean the hull. Furthermore, it will save your back from having to bend down too far to clean your kayak out thoroughly.
If it is especially hot on the day you are setting up to clean your kayak, you may even consider setting an EZ-Up Tent over your kayak to provide shade while you are actually doing the cleaning.
This will make the cleaning process itself more physically comfortable for you and you will be able to move or take the tent down once you are done cleaning your kayak in order to let it receive direct sunlight to dry.
Start By Vacuuming Your Kayak Out
Photo by Kevin Tichenor via Shutterstock
In many cases, it is easier to remove dust, dirt, and other loose debris when it is dry versus when it gets wet and heavier. So a good place to start is to grab your shop vacuum and remove as much debris as possible.
Most kayakers focus on the cockpit and storage hatches during this initial cleaning process. These areas are harder to get water out of, so it is better to remove as much debris as possible while these areas are dry.
Then Give It a Complete Rinse
Photo by John Carlin via Flickr
The best way to rinse your kayak before cleaning is to utilize some type of garden hose. This will allow you to spray your kayak at a higher pressure in order to loosen up any dirt, scum, or debris that has become caked on.
Make sure to rinse the deck, cockpit, and hull thoroughly. Whether you have a sit-inside or sit-on-top kayak, you should also open any enclosed storage hatches and give them a quick rinse as well.
Because water is going to be a little more difficult to remove from hatches and compartments, some kayakers actually apply a small amount of cleaning solution to a cloth or rag and wipe the compartments out instead of spraying a bunch of water inside.
If your kayak isn’t too dirty, your goal with this step is simply to get it wet to prepare for the next step. That being said, be sure to spend a little more time applying direct water pressure to any areas that have larger buildups of dirt or debris.
Use Your Kayak Cleaning Solution
If you have one of the best cleaners for plastic kayaks on hand, it is time to use it! Be sure to follow the directions that come with your cleaning solution in order to guarantee maximum effectiveness.
If you don’t have a cleaning solution that is specifically made for kayaks, you can also mix a mild detergent with warm water in a small bucket. Dip your sponge or small cloth in your soapy water and use a generous amount of elbow grease to wipe down all of your kayak’s nooks and crannies.
This includes down in all of the molded-in footrests on kayaks that have them, inside the storage compartments, under and around any bungee rigging on the deck, inside the cockpit, and, of course, along the entire length of the hull and gunwales.
Rinse Again Thoroughly
Photo by Kay Denneny via Flickr
Now perform a second rinse to remove your cleaning solution along with any debris that you have loosened during your scrubbing process. You will need to flip your kayak over in order to do this completely, which will also help you drain excess water out of the cockpit.
If you have one of the best touring kayaks or any other style with a sit-inside cockpit, you may also need to tilt your kayak up from the bow or stern in order to get the majority of the water out of the cockpit.
To rinse your sit-inside kayak thoroughly, don’t hesitate to do this multiple times until the water that you see running out of the cockpit appears relatively clear and devoid of soapy residue.
Wipe It Down
Photo by Koldunov Alexey via Shutterstock
Now grab your large microfiber or cotton towel and wipe your kayak down thoroughly. If you have a sit-inside kayak, you may want to use your bilge pump and a secondary dry sponge to remove as much water as possible from the cockpit before you begin to wipe it down.
This can also be useful for sit-on-top kayaks when you need to remove any excess water from inside the storage compartments or the footrests. You can also use a sponge or thick towel to blot up some of the water from your kayak seat or other components that tend to soak up more water than others.
Let it Dry Completely
Photo by Cathy Kovarik via Shutterstock
If you have been working under a tent, it is time to move it so that your kayak can sit in direct sunlight to begin drying. We recommend allowing your kayak to sit outside for roughly 4 to 6 hours before moving it to your preferred storage space.
If you need to speed up the drying process, some people use a leaf blower to blow any excess water off the deck and hull after your wipe it down. This can also help to speed up the process of drying out your kayak seat and storage hatches.
Another tip for those that don’t have a ton of time to leave their kayak outside after cleaning it is simply to move it into your garage. Then, you can place a small box fan nearby to facilitate additional airflow to speed up your kayak’s drying time.
Additional Tips For Cleaning a Fiberglass Kayak
Photo by Gherzak via Shutterstock
Fiberglass kayaks are some of the lightest options out there, which make them great for long-distance paddling. That being said, they do require a few extra steps to clean and maintain properly.
Here are some quick additional tips to help you clean your fiberglass kayak:
Consider Using a Fiberglass Stain Remover (FSR)
Fiberglass kayaks are more likely to accumulate set in surface stains. This product will help you remove scum and debris, but it can only be used on kayaks with a gel-coat finish.
Finish With a Wax Coating
After you complete the cleaning process and you allow your fiberglass kayak to dry completely, use a damp terry cloth to apply wax to your kayak’s entire exterior surface. Work in small sections (wax on, wax off) so that the wax doesn’t dry before you can wipe it off.
Additional Tips For Cleaning a Wooden Kayak
Photo by marekuliasz via Shutterstock
If you use one of the best plywood kayak plans to build your own wooden kayak, you will wind up with one of the most unique and durable kayaks out there. As you might imagine, however, a wooden kayak requires different care than a fiberglass or plastic kayak.
So consider these additional suggestions for cleaning a wooden kayak if you have one:
- Avoid harsh chemicals that can eat away the protective coating on your wooden kayak
- Use minimal water inside the cockpit
- Instead, opt for using a damp cloth dipped in a mild detergent to wipe the cockpit and storage hatches
- Try to clean it in more mild temperatures to avoid swelling and warping of the wood
- Consider gently sanding the exterior and re-applying a new coat of stain or varnish annually or every other year
- Repair any broken fittings or reseal any compromised seams before applying any water to avoid compromising the integrity of your wooden kayak
Final Thoughts
Photo by Koldunov Alexey via Shutterstock
We can’t emphasize enough how important it is that you take good care of your kayak. Not only will it help to ensure that your kayak will last for years to come, but it will also ensure the health of the waterways that you like to use your kayak on.
Please be careful to take note of any watercraft inspection requirements for the parks or locations you are visiting to go kayaking. These requirements will help us keep our favorite kayaking destinations healthy and beautiful for decades to come!


