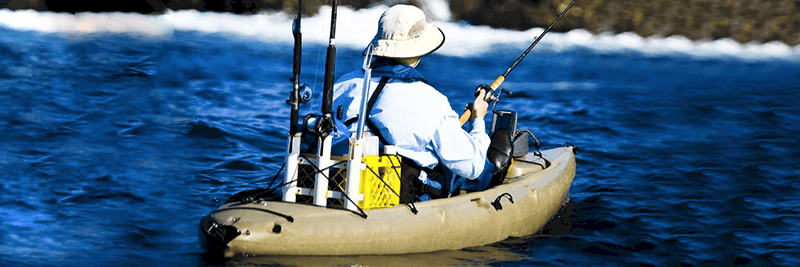
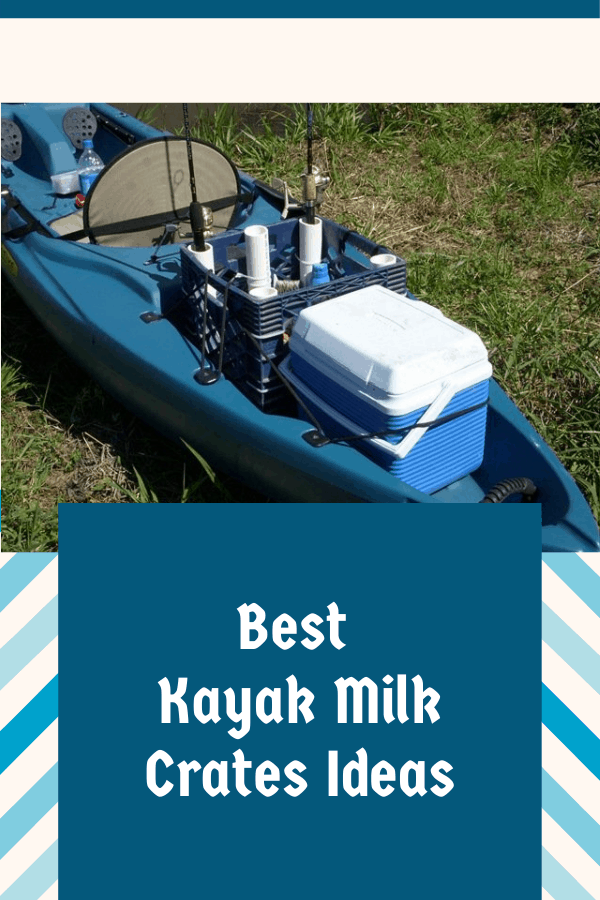
Pretty much all kayak anglers have the same problem: there’s never quite enough secure storage space available on a kayak for all of your essential kayak fishing gear.
That’s why some folks browse the best milk crate ideas for kayaks.
Adding a milk crate in the bow or stern storage compartment of your kayak will make it much easier to keep all of your fishing gear stored securely.
Milk crates also tend to be a bit more affordable than a fishing tackle box that’s specially designed for a kayak.
There are, of course, ethical considerations that come into play when you’re exploring how (and where) to source milk crates from for your kayak.
But, fortunately, we’ll provide some best practices for doing so in this guide.
We’ll also expand upon the five best milk crate ideas that we’ve seen to date.
We’ll also provide more insights into the real-world pros and cons of adding a milk crate to your kayak.
So let’s dive right in!
Why Use A Milk Crate On A Kayak?
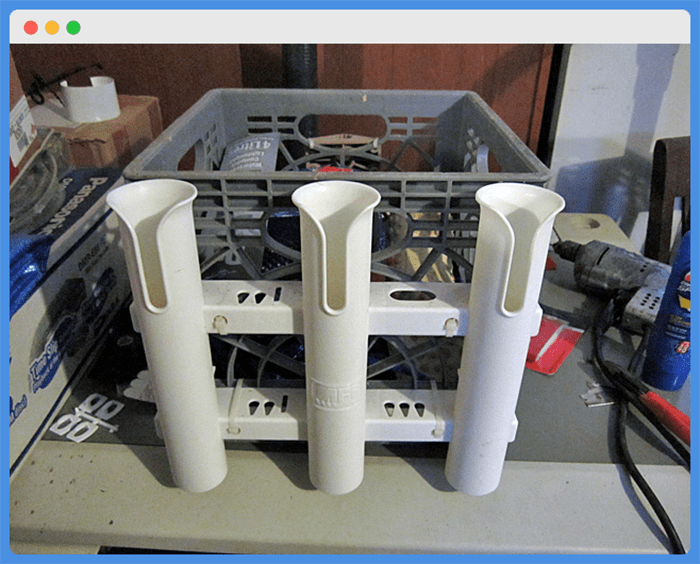
At first glance, milk crates and kayaks seem like an odd marriage indeed.
But some of the tackle crates that are out there on the market these days are insanely expensive and many of them don’t amount to much more than a glorified milk crate.
The main purpose of attaching a milk crate to your kayak is to put things inside of it.
It provides a more secure storage space than just the open storage compartments that are included as standard equipment on most kayaks.
The reason that you should consider a milk crate over a tackle box that’s specifically designed for kayaks is that it will save you money.
Milk crates can be ethically obtained for a fraction of the cost of the best tackle boxes for kayak fishing.
When A Milk Crate Won’t Work
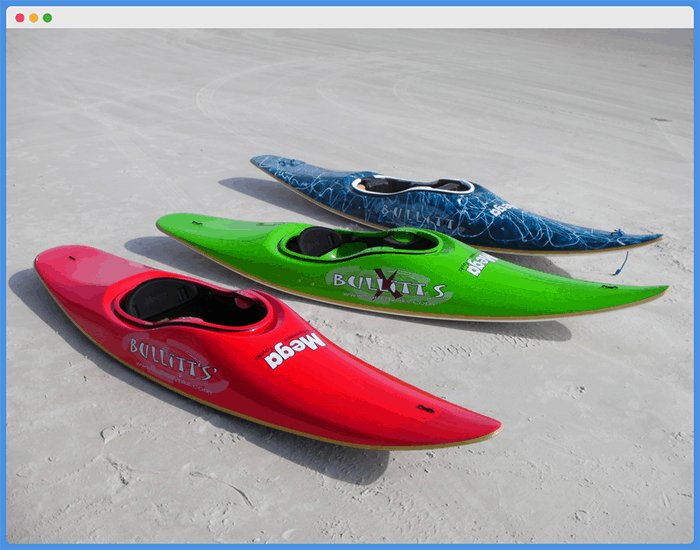
To be honest, adding a milk crate to increase your kayak’s storage capacity simply isn’t possible with every single kayak out there.
There are, in fact, some kayaks that are better suited to a milk crate addition than others.
Generally speaking, you’ll find the best fishing kayaks to be the ideal suitors for a milk crate addition.
While it’s possible to add a milk crate on touring kayaks, surf kayaks, or whitewater kayaks, you’ll find this to be a rare occurrence once you venture further into the world of kayaking.
Pros and Cons of Milk Crate Storage
Before we dive into the ideas for adding a milk crate to your kayak, it’s important to highlight some of the main pros and cons of milk crate storage.
These advantages and disadvantages are pretty much universal, regardless of the specific kayak and milk crate design you are working with.
Pro #1: Provides More Organized Storage Space
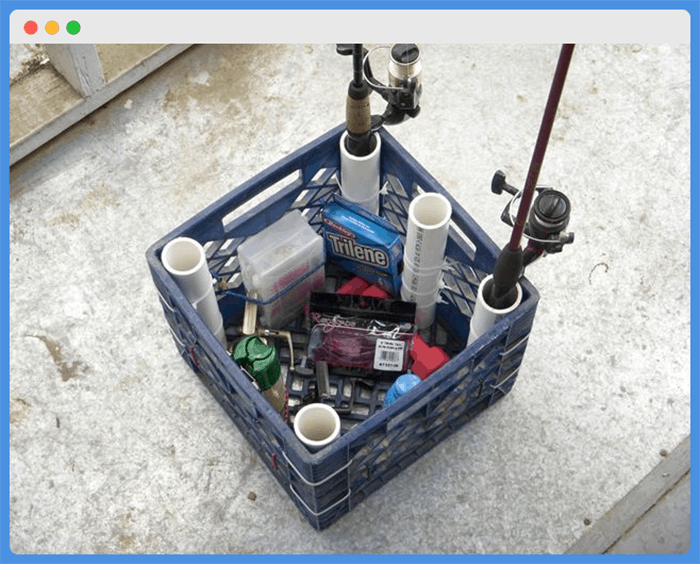
Adding a milk crate to your kayak will give you a more organized and dedicated area for all of your fishing gear and tackle.
It’s especially effective if the kayak you own didn’t come with a bunch of smaller compartments or storage hatches already in the kayak itself.
The open nature of these milk crates also makes it easier to quickly grab anything you need while you’re fishing.
Because they can be removed from your kayak when you’re done fishing, you can also load them at home and transport fishing gear from your garage to your vehicle without needing to repack everything multiple times.
Pro #2: Saves You Money
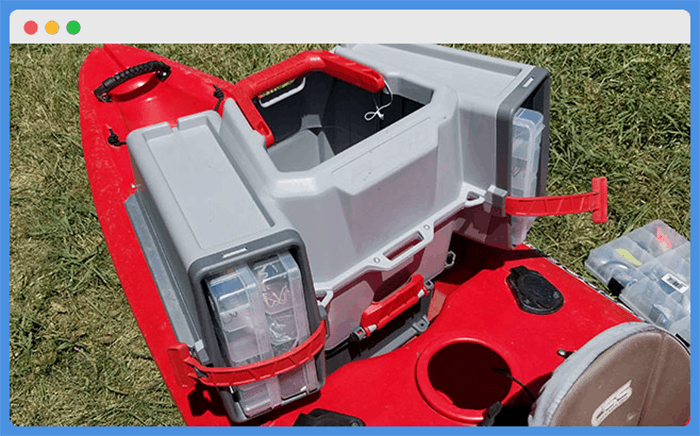
Some of the kayak-specific tackles boxes out there cost a lot more than you might imagine, For example, the tackle box that’s pictured above from Plano retails for nearly $100.
Milk crates are available for a fraction of that cost and, in some cases, places even give them away for free.
We’ve heard stories of kayak anglers grabbing up to a half-a-dozen milk crates for $1 and others have stumbled across old crates on the side of the road in their travels.
While we recommend consulting this fantastic article on the ethics of acquiring milk crates for kayak storage, we’ve found that it’s pretty hard to argue that milk crates are the more affordable storage option for kayak anglers.
Con #1: Not Watertight
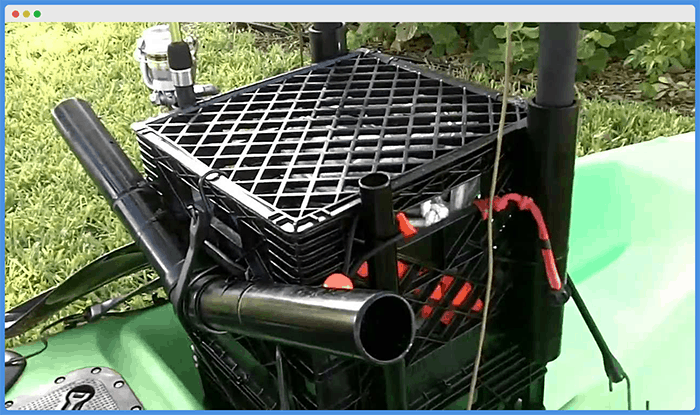
That being said, we hope you can tell just by looking at them that milk crates aren’t the most watertight storage option for your kayak fishing gear.
They’re secure, sure, but you’ll probably have to get more creative if you plan to store anything in there that you absolutely have to keep dry.
Fortunately, most smaller tackle boxes that would fit inside a milk crate are watertight or, at the very least, water-resistant.
You can always check out our article on how to choose the right size dry bag for kayaking if you want to keep a small dry bag inside your milk crate storage area.
Con #2: Some Assembly Will Be Required
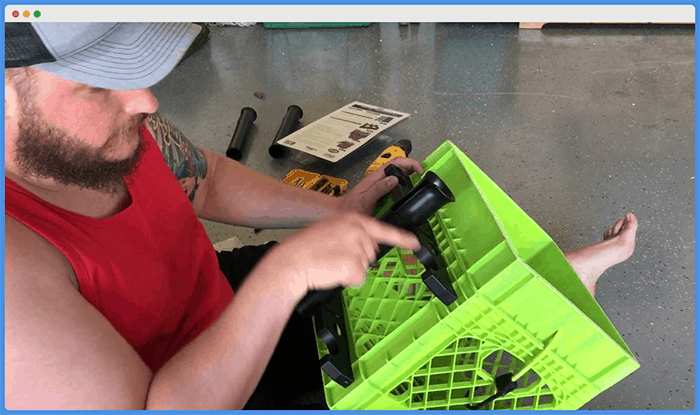
The final con of using a milk crate to store your kayak fishing tackle is that you’ll have to do a little work to get your ideal milk crate solution ready for your kayak.
Depending on the design you choose, that assembly might require several hours or several days of DIY work.
But, rest assured that assembling a milk crate storage solution for your kayak is a lot less work than, say, installing a motor mount for your fishing kayak.
At the end of the day, it’s a small price to pay to have an affordable, effective tackle storage solution for your kayak.
Best Milk Crate Ideas
1. Turn Three Into One
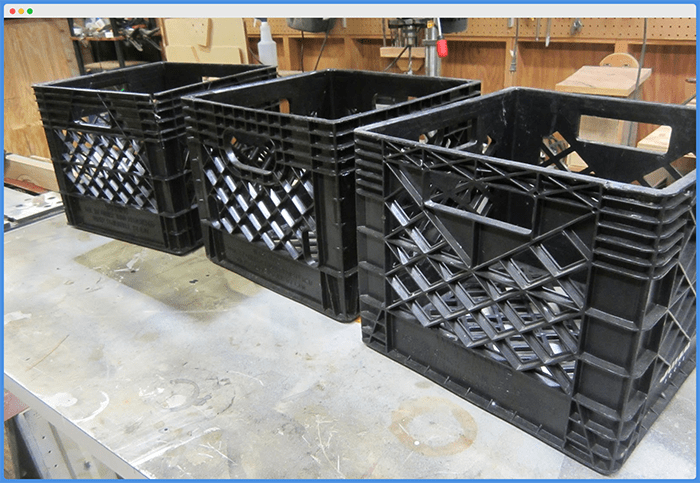
This interesting milk crate ideas actually requires that you find three milk crates of identical sizes before you start.
One crate, of course, will be the base and you’ll use the entire thing in the design, but the other two will need to be modified slightly.
With the second crate, you’re going to mark an inch up from the base all the way around the crate.
Then, you’ll cut along that marked line so that you wind up with an open base that’s only about an inch deep all the way around.
With the third crate, you’ll perform a similar cut, but you’ll be cutting right where the solid part of the crate’s base meets the mesh middle section.
If that’s not quite clear, check out the picture below.
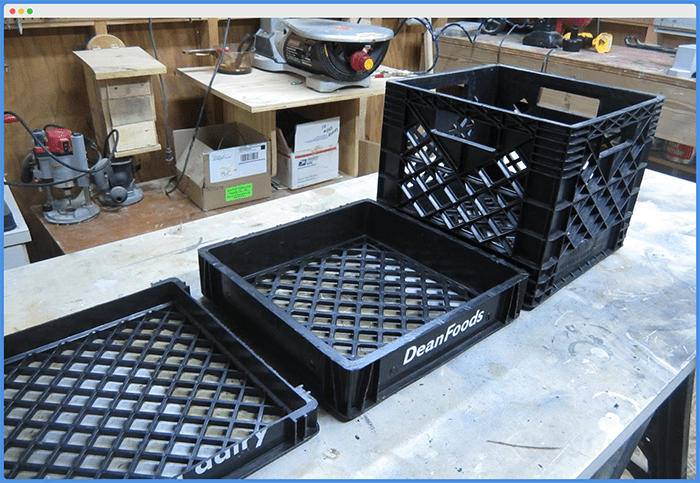
These three pieces will then be stacked on top of one another to finalize this design.
First comes the deeper of the two cut trays (pictured in the middle above) and then the shallower tray flips upside down and sits on top of that.
This creates a large storage area in the bottom, a more shallow “bait tray” in the middle, and a secure lid for the entire crate on the top.
The only thing you’ll have left to do is to secure these three pieces together but first, here’s a photo of the three pieces together.
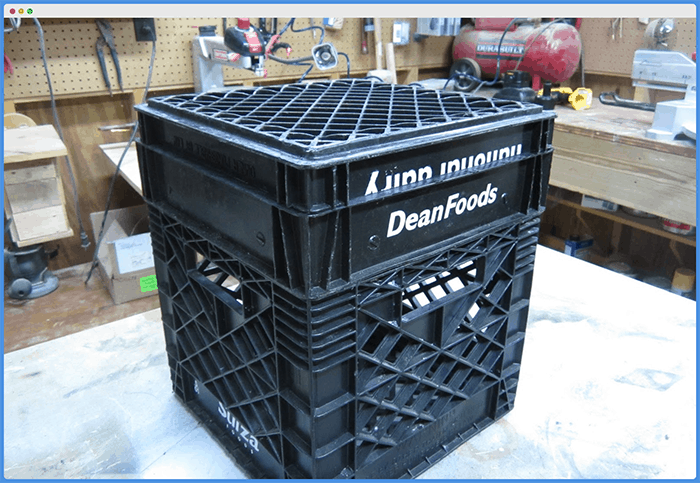
In terms of securing the pieces together, you’ll have many options at your disposal.
One of the simplest methods you could choose would be to use bungee cords to simply strap the two lid pieces down to the bottom piece and a separate set of bungees to strap the bottom piece to your kayak.
If you want to get fancier, you could use nylon bolts to secure the bottom piece permanently to your kayak.
From there, you could install small hinges on the edges of the lids so that they flip open and remain connected.
The only problem with these solutions is that you’ll have to drill into your kayak and find some sort of latch to keep the lid secure when you want to keep it closed.
But if you’re interested in taking this route, we recommend you watch this short video on how to safely drill into your kayak!
2. Open Crate With Internal Rod Holders
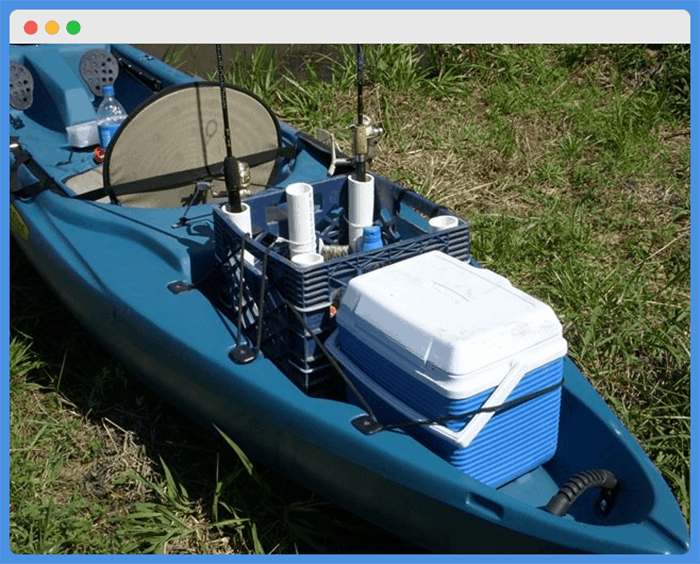
Another super-easy way to employ a milk crate for fishing tackle storage is simply to place it in your kayak and secure it down using bungee cords.
If you really want to improve your quality of fishing life, you’ll also consider adding internal fishing rod holders to the crate.
We love this solution because it’s super affordable and only requires the milk crate and a few sections of PVC pipe.
Start by measuring the depth of your milk crate and the diameter of your widest fishing rods.
The width of your widest rod will determine the width of the PVC pipe you should buy for this solution.
Your rods should be able to fit into the PVC pipes without much (or any) force.
From there, you’ll need to determine how many rod holders you want to add to your crate.
For example, let’s say that the crate pictured above is 12 inches deep and, as you can see, this person added a total of five holders to his or her crate.
That means you would need to start with about five feet (12 x 5 = 60 inches, which is, of course, five feet) of PVC pipe.
You’d then cut it into your five equal-length sections and secure those sections into your crate using zip ties.
As easy as that sounds, one problem with this solution is that the contents of your crate can fall out if you capsize.
That’s why we’d recommend getting smaller watertight tackle boxes that you can store inside the crate if you choose this option.
The other problem with this solution is that it takes what is already a relatively small storage space and further restricts it by adding tubes in the corners.
So if you want to retain the entire space inside of your crate for storage, check out this next idea.
3. Open Crate With External Rod Holders
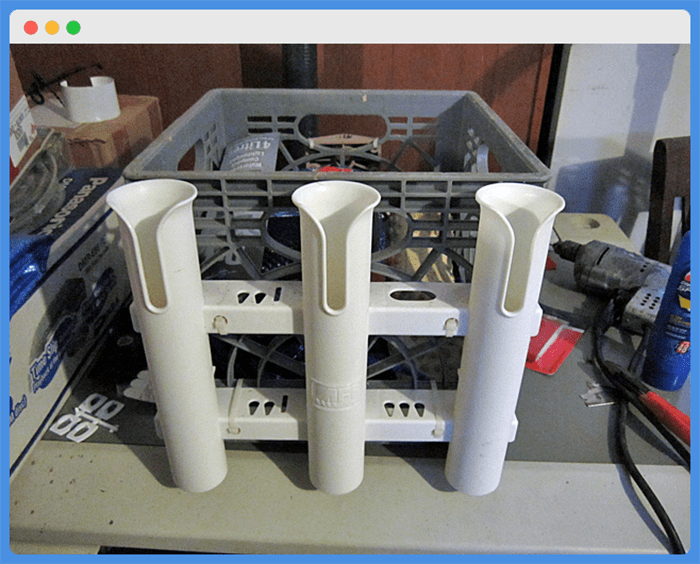
Boom! Instead of putting the fishing rods on the inside of your milk crate, you can also zip tie or bolt them to the exterior.
While it’s still an incredibly affordable option, it’s slightly more costly than the previous idea because you’ll need to buy prefabricated rod holders.
The reason for this is that you’ll need rod holders with a molded-in bottom so that your fishing rods don’t stick out.
That’s why most people don’t go with the PVC pipe option if they’re attaching rod holders to the outside of their milk crate.
Some, however, will make the argument that there’s no difference because the reel should keep your rod from falling out of the bottom of the pipes.
But most experienced anglers know that there’s no reason to place the weight of your rod directly on the reel for any length of time.
Fortunately, there are plenty of pre-fabricated rod holders out there for you to choose from.
Some of our favorites include these options from BigTron, Marinebaby, Hiumi, and Kufa Sports.
4. The Two in One
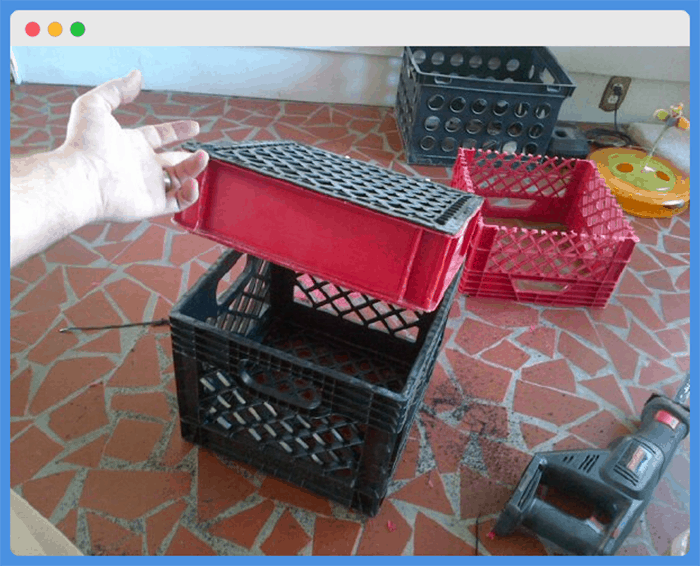
If you thought the three-in-one option was a bit too complex, you’ll love this simpler alternative.
This one starts with just two milk crates and the second one essentially turns into the lid for your finished version.
As you can see in the background of the photo above, you’ll cut the second crate just above the solid bottom section.
That cut part will then flip over and become the lid that sits on top of the other intact crate.
Now, the downside of this design is that you won’t have a shallow bait tray on top of your larger storage crate.
But you also won’t have to spend as much time cutting milk crates, which should give you more time to actually spend on the water.
Once you have your second crate cut, you’ll need to come up with something to secure the two pieces together.
A couple of simple hinges should do the trick on the one side, but there are several techniques we’ve seen for securing the non-hinging side.
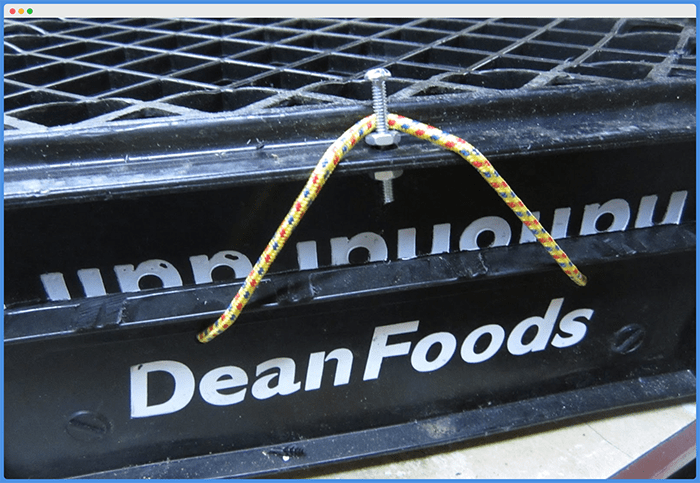
One of our favorites is just to drill a small nail into the top of the lid right at the center of the side that’s opposite the hinges.
From there, find a relatively short bungee cord (six or 12 inches should be fine) and hook it onto either side of the bottom crate at the top of the center mesh section.
That bungee cord should then be able to pull and loop over the screw or bolt you’ve installed on top of the lid.
If you use an appropriately-sized bungee cord, it should put enough downward force on the lid to keep it shut until you remove the bungee (and it might look something like this!).
5. The Trolling Master’s Crate
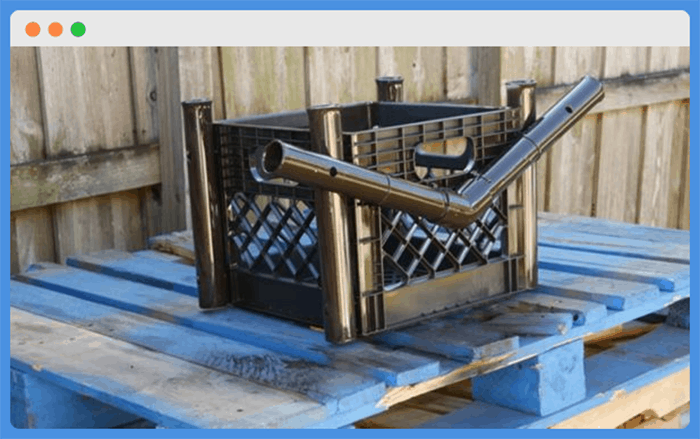
We’re affectionately calling the final design idea that we want to share with you ”˜The Trolling Master’s Crate’ because, as you can see, it will allow you to have as many as four lines in the water at once as your hands are free to maneuver your kayak.
And even if you only use the V-shaped piece on the front of the crate, you’ll still be able to troll two lines at once without much worry about them becoming tangled or snagged around one another.
The vertical rod holders that you see on the above design are much the same as the external rod holders on the aforementioned idea above. And single rod holders (like these from CE Smith) are also available online.
But you might have to fabricate the V-shaped piece for the front or back of your milk crate.
For this, you’ll need a section of PVC pipe (sized according to the width of your kayak) and a 45-degree angle PVC connector.
For practical purposes, you’ll want to keep the diagonal rod holders from extending too far beyond the natural edges of your kayak.
If your kayak is 34 inches wide, for example, you probably don’t want to buy an initial PVC section much longer than 40 inches.
This is because you’ll be cutting that section in half before installing the halves on either side of your 45-degree connector.
The connector itself will give you another inch or two of length on either side, which means that you’ll likely have two rod holders of about 21 or 22 inches in length (according to the 40-inch initial piece from above).
Of course, this can change depending on the exact design of your kayak and your preferences.
While there’s not necessarily anything wrong with having those sections extend well past the edges of your kayak, it will create an additional snagging risk if you ever find yourself navigating through a particularly narrow waterway.
Final Thoughts
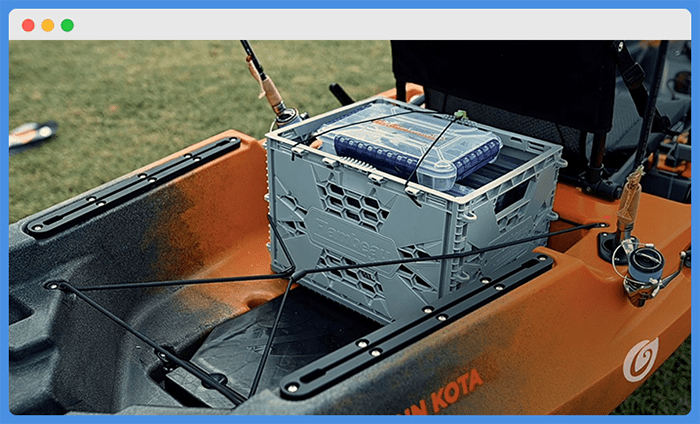
While the aforementioned milk crate ideas are easy enough, there’s also something to be said for purchasing a pre-made tackle box that easily fits into and secures in the storage compartment of your kayak.
Models like the Plano Weekend Series and the Wilderness Systems Kayak Crate do provide the kind of watertight storage that most kayak crates can’t offer.
But they will cost you much more than a milk crate.
So, if you want to add an organized tackle box to your kayak without spending a whole bunch of dough, adding a milk crate is the surefire way to go!
We hope you’ve enjoyed these insights and, as always, we wish you the best of luck on all of your upcoming kayak adventures!

